

Create a Simple RESTful Service using Visual Studio
Posted by Dave at 12/24/2015 4:23:20 PM
RESTful services are REALLY simple to consume. But they don't have to be complicated to build. This tutorial will help you create a VERY simple REST service that you can build with the FREE Visual Studio 2015 Community Edition and deploy with a FREE Azure AD account.
That's it! You can customize and extend from there! It is so much easier than WCF of Web services that anytime I need to spin up a new service I will try to do it in REST first.
- Launch Visual Studio and create a new WCF Service Application. I called mine SimpleRESTService.
- Delete the files IService1.cs and Service1.src. We will replace them with similar files of our own.
- Right click on your project and select Add, New Item. In the Add New Item dialog, under Web, select WCF Service. Name the new file something like MyService.svc. Note that this creates two files: IMyService.cs, which defines the interface for the service, and MyService.svc, which implements the IMyService interface.
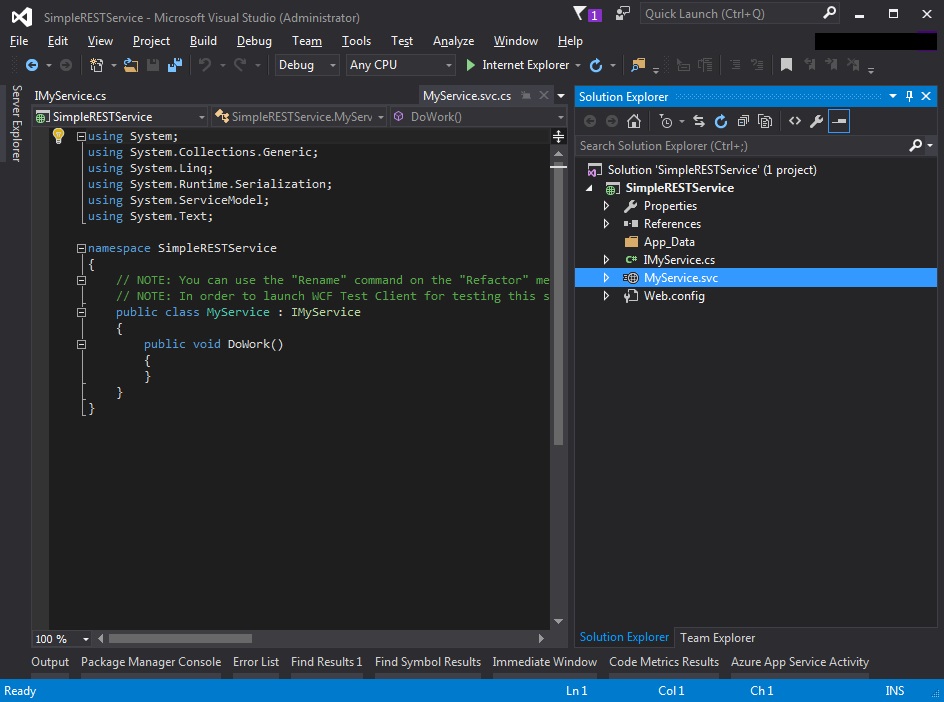
- Now we will write code to set up RESTful service methods. Open IMyService.cs and replace the code with this.
using System.ServiceModel; using System.ServiceModel.Web; namespace SimpleRESTService { [ServiceContract] public interface IMyService { [OperationContract] [WebInvoke(Method = "GET", ResponseFormat = WebMessageFormat.Xml, BodyStyle = WebMessageBodyStyle.Wrapped, UriTemplate = "xml/{id}")] string XmlData(string id); [OperationContract] [WebInvoke(Method = "GET", ResponseFormat = WebMessageFormat.Json, BodyStyle = WebMessageBodyStyle.Wrapped, UriTemplate = "json/{id}")] string JsonData(string id); } } - Open MyService.svc.cs and replace the existing code with this:
namespace SimpleRESTService { public class MyService : IMyService { public string XmlData(string id) { return "You requested id " + id; } public string JsonData(string id) { return "You requested id " + id; } } } - Now open the web.config file and replace the code with this:
<?xml version="1.0"?> <configuration> <appSettings> <add key="aspnet:UseTaskFriendlySynchronizationContext" value="true" /> </appSettings> <system.web> <compilation debug="true" targetFramework="4.5.2" /> <httpRuntime targetFramework="4.5.2"/> </system.web> <system.serviceModel> <services> <service name="SimpleRESTService.MyService" behaviorConfiguration="ServiceBehaviour"> <endpoint address="" binding ="webHttpBinding" contract="SimpleRESTService.IMyService" behaviorConfiguration="web"></endpoint> </service> </services> <behaviors> <serviceBehaviors> <behavior name="ServiceBehaviour"> <serviceMetadata httpGetEnabled="true"/> <serviceDebug includeExceptionDetailInFaults="false"/> </behavior> </serviceBehaviors> <endpointBehaviors> <behavior name="web"> <webHttp/> </behavior> </endpointBehaviors> </behaviors> </system.serviceModel> </configuration> - That's it! We are ready to test! In Solution Explorer, select the solution, then press F5. This will launch a web browser and open your site. Don't freak yet, because we need to add a little bit to the Url.
- In the Url bar, add MyService.svc and that will bring up the WCF service home page. But that's not really what we want. We want to access the REST service.
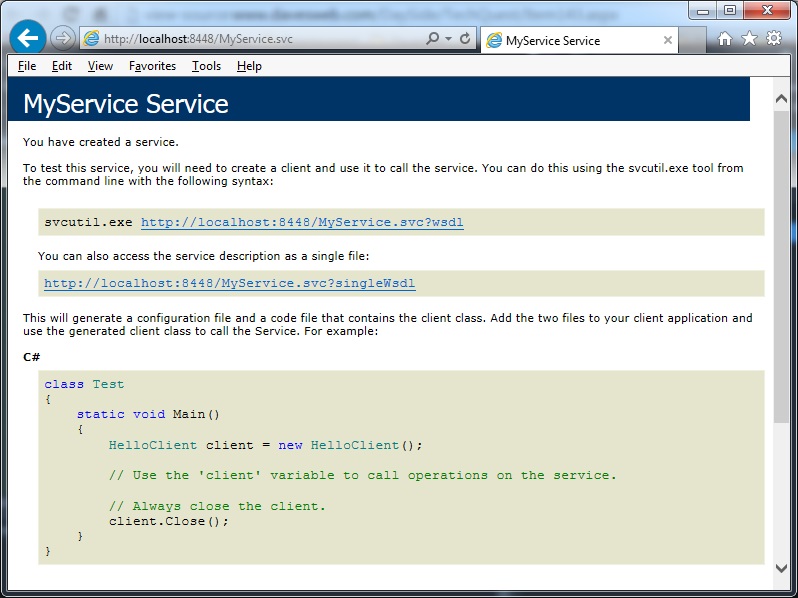
- In the Url bar, append /xml/12345 so the full Url is something like http://localhost:8448/MyService.svc/xml/12345 and you will see the Xml returned by the REST service!
<?xml version="1.0"?> -<XmlDataResponse xmlns="http://tempuri.org/"> <XmlDataResult>You requested id 12345</XmlDataResult> </XmlDataResponse> - Replace the xml in the Url with json and you will see the same thing with the result returned in json. Your browser may ask you whether you want to Open or Save the result.

That's it! You can customize and extend from there! It is so much easier than WCF of Web services that anytime I need to spin up a new service I will try to do it in REST first.
3,740 views.